¶ Pre-operation Preparation
¶ Prepare Print Head and Film Clips
-
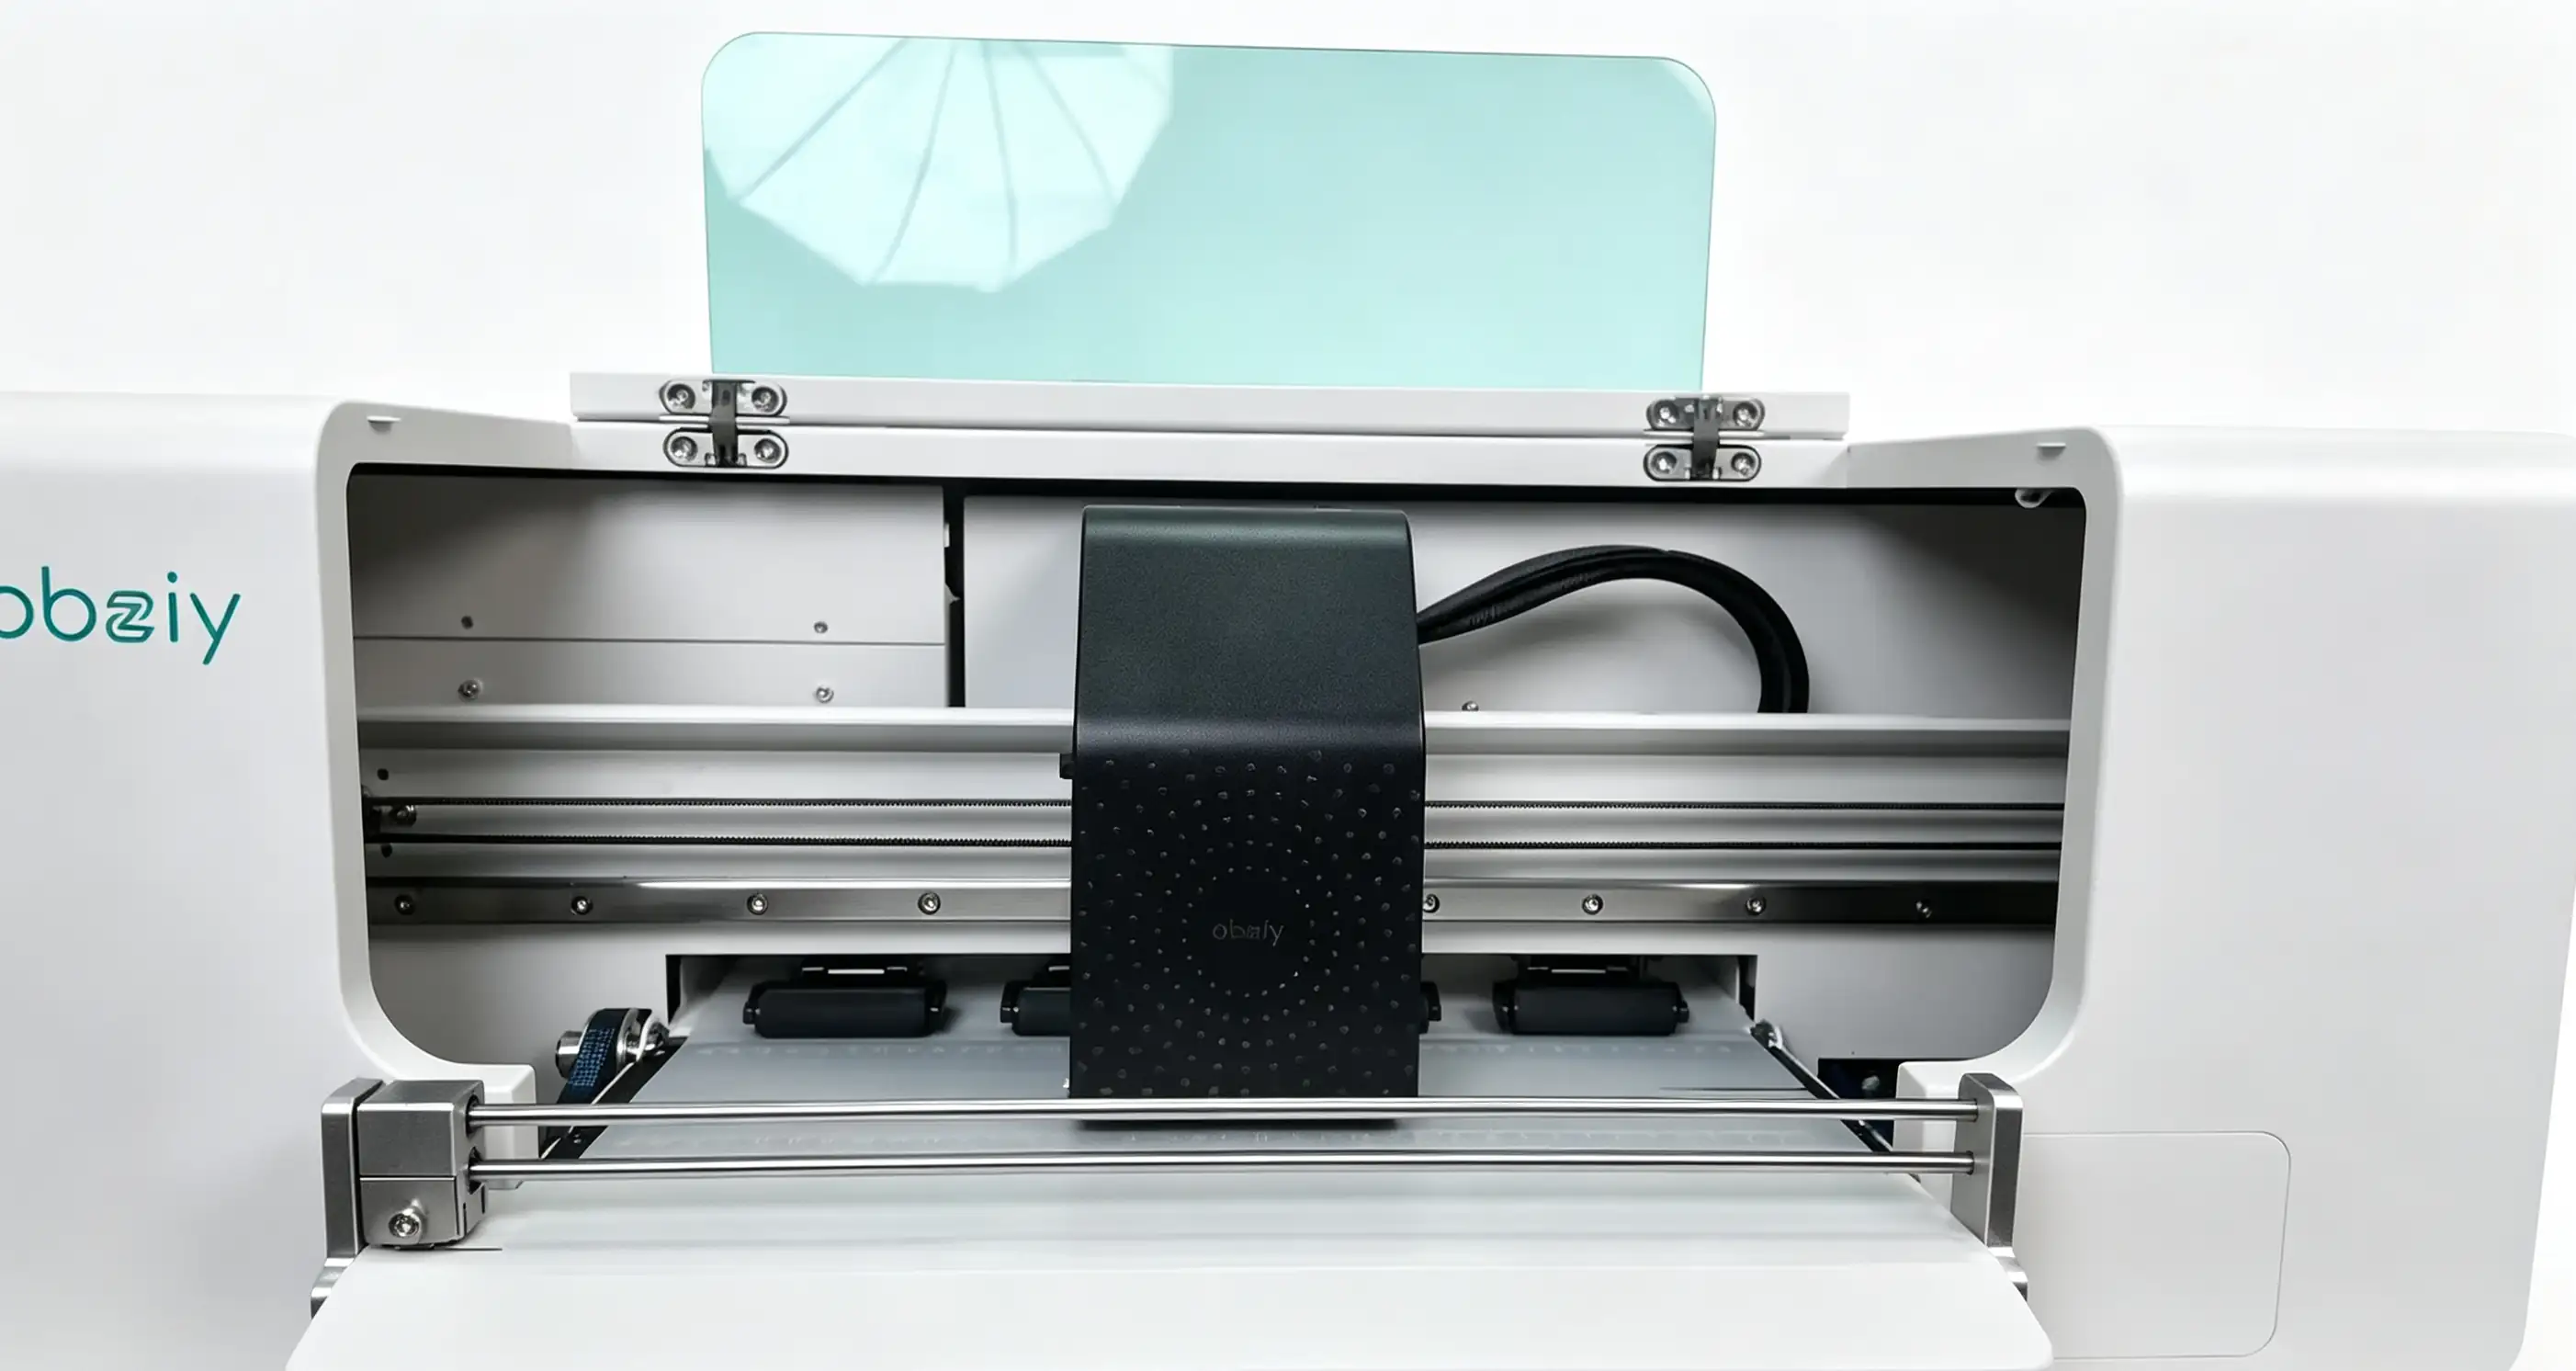
Open the printer cover.
-
Unscrew the two fixing bolts securing the print head.
-
Move the print head to the right side of the printer.
-
Peel off the adhesive tape fixing the film clips, then slide the two clips to both sides.
⚠️ NOTE: Film clips must be removed when using 38cm wide transfer film. Slide both clips all the way to the far right, shift the print head to the left, then slide the clips out along the rails to detach them completely.
¶ Install Bracket & Printer Film Roll
- Mount the bracket onto the printer with four screws. Distinguish left and right sides as shown in the diagram, and ensure the film roll is centered.
- Loosen the flange screw with a screwdriver and remove the flange.
- Slide the film roll onto the screw shaft, then fit the flange back on.
- Align both ends of the film roll with the recesses on the bracket and set it down.
⚠️ NOTE: Pay attention to the correct orientation when installing the film roll.
¶ Feed Printing Film into the Machine
- Press the pinch roller switch to release the pinch rollers.
- Feed the film into the printer’s feed inlet. Rotate the film roll from the rear of the machine and slowly pull the film out from under the pinch rollers.
- Ensure the film extends past the starting edge of the processing zone, covering beyond the black marked area.
- Align the film to the left-right center by referencing the scale ruler on the output platform.
- Toggle the pinch roller switch to clamp the film tightly with the pinch rollers.
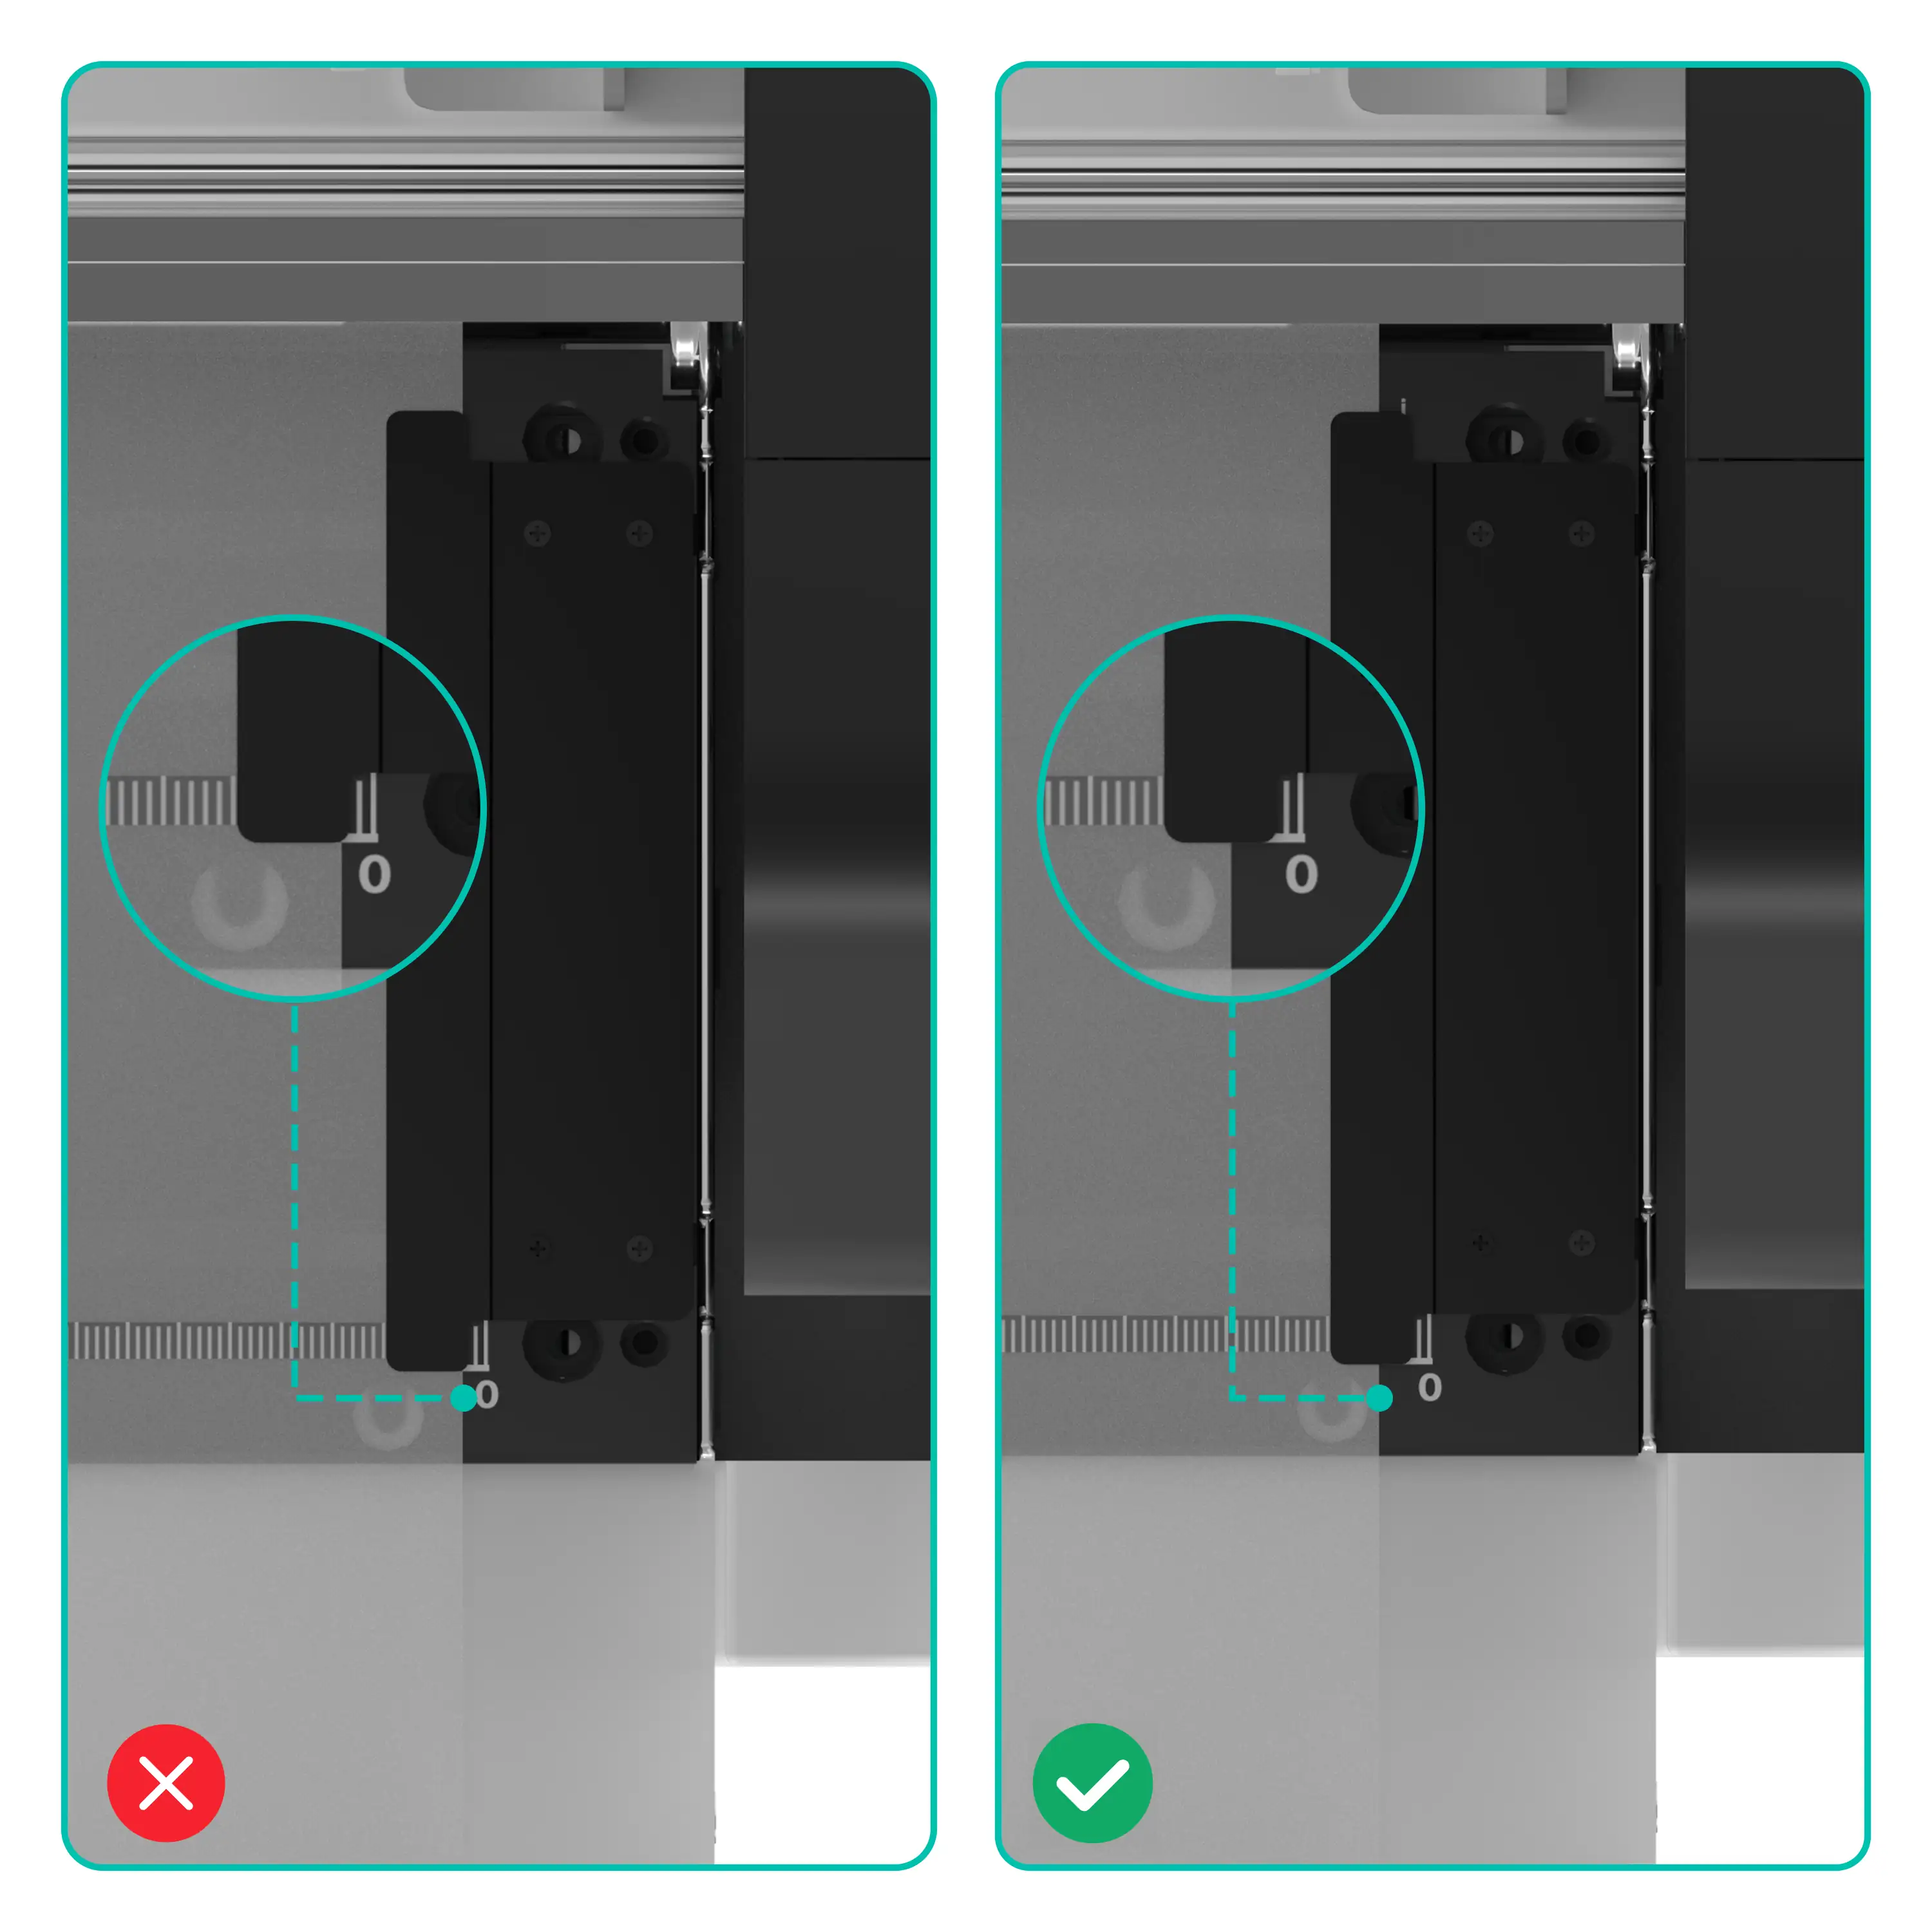
- Adjust the paper retaining tabs on both sides to cover the film.
⚠️ NOTE: The tabs should only overlap half of the film width. Do not clamp the film too tight, nor position them too far inward or outward. Improper adjustment may cause the film to bulge and scratch the print head.
¶ Fill Humidifier Liquid and Ink
- Open the side cover panel of the printer, then unscrew the cap of the humidifier liquid bottle.
- Uncap the humidifier liquid bottle and peel off the sealing film on the bottle mouth.
- Pour humidifier liquid into the bottle and tighten the cap back on.
⚠️ NOTE: Reserve an appropriate amount of humidifier liquid for regular subsequent maintenance.
- Unscrew the bottle caps of the ink tanks at the rear of the printer.
- Pour ink into each ink tank.
⚠️ NOTE: Shake white ink thoroughly before pouring it into the ink tank.
¶ Connect Power & Complete Ink Priming and Cleaning via Printer Touchscreen
- Plug the power cord into the equipment and the wall socket, then press the printer power switch located above the power cord port.
⚠️ NOTE: Keep the power supply connected for normal equipment operation and maintenance.
- Wait for the print head initialization process to finish after power-on. Tap Load Ink under the Maintain menu on the touchscreen. You may observe the ink tubes and ink cartridges to check if ink filling is complete. When priming finishes, ink will flow into the waste ink bottle for visual confirmation.
- Perform a Medium cleaning cycle once ink priming is fully completed.
- Print a nozzle test strip after cleaning to inspect print head condition. A qualified test strip, as shown in the reference image, contains no blurring, ink splatters or missing lines.